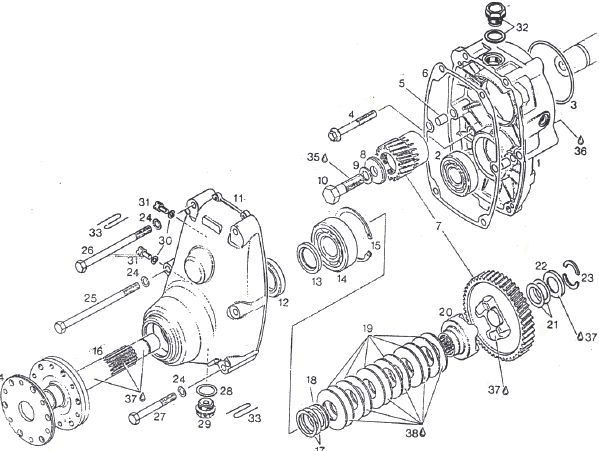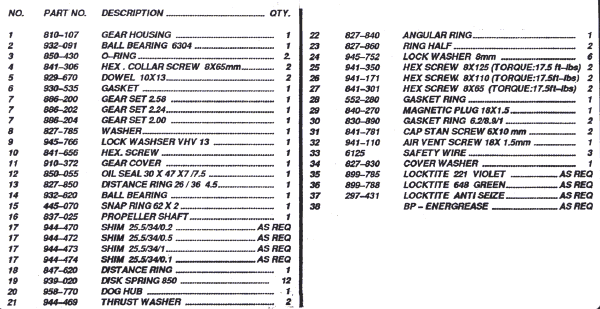

Rotax "B" type Gear Box


1. Clean and degease the crankshaft end and mounting holes on the crankcase before starting.
2. Using the Rotax fixation tool supplied in the Rotax tool kit lock the engine up by installing the pin into the impulse hole, used to run the fuel pump. With the pin in place rotate the engine, until it locks.
3. Install drive gear onto crankshaft end, with the lockwasher under the head of the bolt, and the flat washer under the lockwasher. Torque to 60Nm (530in.lbs.)
4. Install the rubber O ring (#3) into the back half of the gearbox, if necessary use dielectric grease to hold ring in place.
5. Position back half of gearbox (#1) onto crankcase. Apply loctite 242 to threads of bolts (#4) install two bolts and torque 22Nm (195in.lbs.) fit gasket (#6) in place.
6. Install front half of gear box housing and secure with bolts and lockwashers. Use loctite 242 on threads and torque to 22Nm (195in.lbs.)
7. Fill gear box with API-GL5 or GL6 oil, from the top, until oil runs out the lower of the two side plugs.
8. Tighten, then safety wire, the top and bottom plugs together.
9. Tighten then safety wire vent cap and drain plug.